Showing posts with label our house. Show all posts

Monday, May 6, 2013

product profile: The Kate Sofa


I don't like running.

Man, if feels good to get that out! I want to like running. I want to be that cute, skinny girl who stands in line at Starbucks and while ordering a frappuccino talks about the amazing twelve mile run she just went on. That will just never be me. I like to work out and would even consider myself relatively athletic so this weekend I set out to find that elusive exercise that is both effective and enjoyable. Enter Crossfit. I attended a free hour-long class and after my windpipe stopped burning and I regained feeling in my legs I was hooked.

How in the world does this relate to furniture and design, you ask? It doesn't really. Other than the fact that I woke up Sunday morning and could barely move. It was that "good" sore feeling where you know you pushed your body just enough to get results but not enough to cause severe injury. Needless to say I was out of commission most of the day and found the most comfortable spot in our house to recuperate:


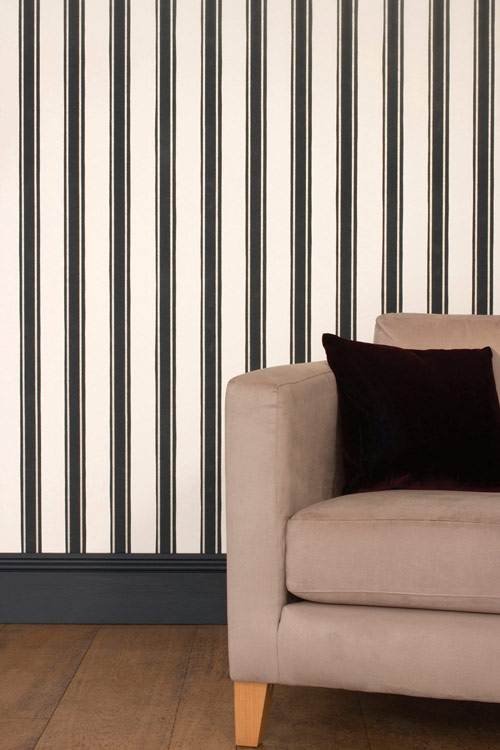
Introducing the first sofa in our Copper + Walnut collection: Kate. This was the first piece of "real" furniture that I purchased upon graduating college and after 5 moves, three states and too many movies to count this is still one of the most comfortable pieces we own. 


{above left} in my Minneapolis condo
{above right} in our first Texas apartment
{below} in our second Texas apartment

It's curved, tight back gives it a unique custom look that could be paired with formal or more casual decor. It seats two generously and three if necessary but is down right heaven for one...sprawled out...with a cozy blanket. 

I can't wait to share more exciting news about the Copper + Walnut Collection as the week progresses! 

Photobucket

Tuesday, April 30, 2013

phdesign: tile disaster

We are going to take a bit of a detour from Market Trends today and focus on a project-gone-wrong as promised on instagram. As I've mentioned in previous posts the design center that we used to build our home did not have many of the upgrades we were looking for. The most frustrating: white tile. You can always paint a wall or even replace kitchen countertops (which, as you know, we did) but changing flooring after the fact can be tricky. To maintain mass appeal for eventual sale we wanted to keep our bathrooms and laundry room neutral. We hired a third party to come as we were handed the keys to our home and had them pull up the hideous plastic flooring and replace it with this hexagon white tile from home depot. Since we were embarking on this project in a non-conventional way we decided to save money by purcashing tile in bulk ourselves and simply paying for installation. Sounds like a great idea, right? 

Wrong. This project took over 6 months to complete. Why would a project that seemed so simple take so long you ask? We were two boxes of tile short in the guest bath and could not find a matching box to save our lives. Home Depot was still stocking the tile from our original order (same item # and everything) but when it showed up it was two shades off. We went through at least 5 re-orders, including two that came directly from the original tile manufacturer, and each time it was the wrong color. Infuriating. 

Finally, about a month ago, my husband had the brilliant idea to order this tile and simply replace the black hexagons with white ones. The boxes arrived and the color matched! Just in time for 8 guests to show up at our house, thank god. 

In the six months that we waited to complete the guest bathroom we also had time for a few new additions: shutters for the master, a wall-mounted drying rack in our laundry room and new mirrors in the guest bath.  

The Master Bath


The Laundry Room


The Guest Bath


I am thrilled to call this update complete. If I can impart any wisdom upon DIY flooring projects it is this: order more material than you think you need. In fact, order a few units more than even the salesperson or your tradesman suggests. As long as the company you are working with has a decent return policy it's so much easier to take things back than it is to track down an exact match after the fact. Trust me.

Hope my mistake can help your project run smoothly! 

Photobucket

Tuesday, April 16, 2013

phdesign: twin guest room {update}


The finished product! 

You might remember this post when I asked for help designing our second guest bedroom. After the floral pattern was declared the winner I immediately got to work. I used a few high end inspiration pictures to come up with this design concept but ultimately wanted to keep the total under $500. We already owned the mattresses and were able to negotiate a very reasonable deal for both, so that cost was not included in my design budget. 


Here is the breakdown: 

Paper: $26
Mirror: $20, Garden Ridge (not online, sorry)
Lamp: $40, Garden Ridge
Boards for the Paper: $12 (similar) 
Nightstand: This was a piece we already owned and repurposed with these pulls, $5 each
Sheets: $35 per set 
Bedskirt: $25 each 
Blankets: $36 each (in full/queen size)
Monogram Pillowcases: $10 each on clearance (no longer available in celery) 


Grand Design Total: $326 


Even though fully furnishing this room isn't in our budget, it doesn't mean I want our future guests to feel slighted. I want our home to be stylish and inviting so taking a little extra time and energy to complete this project was the perfect solution. Friends have told me that when presented with a blank canvas they often don't know where to begin. Here are a few tips:

  • Choose a color scheme or pattern to begin with and build from there (for me, it was the green and orange floral paper). 
  • Focus your budget on high impact items like linens and pillows, your guests will remember and appreciate this.
  • Don't ever be afraid to repurpose or re-imagine furniture you already own, new is not always better. 
  • Find magazine spreads or photos online that inspire you and use them as a guide. 


To quote one of my favorite guilty pleasures {The Real Housewives} "money can't buy you class" and it certainly isn't a requirement for style either.

Photobucket

Monday, April 8, 2013

product profile: upton chair


Our chesterfield sofa has been flying solo in our family room...until now. After months of saving money and rejecting fabric samples we finally have new chairs. I wanted a silhouette that was unique and not too boxy but still coordinated with the rolled back of our sofa. We also needed a size that would fit a 6'3" man comfortably but would still look chic enough for his wife. 

Enter the Upton Chair! 


In this fabric: 
With these contrasting pillows: 


The pillow comes included and we specified down filling for added comfort. I love using fun, trendy fabric for things like pillows and trim. Typically these are the elements that I get tired of first and changing them is easy, affordable and can give you a completely new look. 


I would define our style as a bit traditional with touches of trends and glam. This chair alone might not be the trendiest silhouette out there but more importantly we wanted to stay true to our personal taste and invest in quality. These chairs will hopefully travel from house to house with us and perhaps someday end up in our basement or as a seating area in a bedroom. 

Hope you enjoyed the quick peek into our family room today. These chairs, amongst others, will eventually be available for purchase right here at Copper + Walnut. 

Photobucket

Monday, April 1, 2013

product profile: outdoor furniture

Spring is almost upon us. If you're in the southern states {like I am} you are going to miss the cool breezes and low humidity of winter. The rest of you never want to see your winter coats again and can't wait for rooftop parties and outdoor bbq's to commence. Am I right?

Since we live in a place that technically allows us to be outside 365 days per year it was time to purchase an outdoor dining set. I've talked a lot about investing in pieces that you either use everyday or can't live without and then hunting retail sales for the rest. Since we are on a budget and these piece are going to be exposed to the extreme elements it was time to pack up the car for a little Easter Ikea road trip.

Of course I hit pinterest first for a little daydreaming:


And then the smell of swedish meatballs and bargains brought be back down to earth. We ended up finding and purchasing this awesome dining set for under $400. We added a bench for $75 to increase our seating but plan to use it somewhere else in the yard when we aren't entertaining.


I'm totally in love with the gray and we also scooped up a few accessories to complete the look.


Photobucket

Tuesday, March 5, 2013

phDesign: DIY side table


Today I am going to share a quick DIY project that I did a few months ago. When my husband and I first moved in together we were a design mess. On top of the fact that we were going from small condos to a house we also had completely different styles. In an effort to meld our tastes together and save some money I decided to take on a few projects. 

Hailing from a set of three (2 sides, one cocktail) this lovely brown metallic table came fully equipped with plastic feet and large exposed rubber stoppers to hold it's glass top in place. If I'm being honest my first reaction was to donate it but then, once I made a few slight adjustments (stoppers and feet found a new home in the garbage), I realized it had a great shape. All it needed were a few slight modifications: this finish, these pretty knobs and some super glue. 


{make sure you clean the entire piece and sand any uneven areas first}


{spray paint is relatively inexpensive so splurge a little on hardware to give your piece a high-end look}


{it's a messy job. prep and cover your workspace thoroughly, wear gloves and make sure you can reach the piece from all angles without moving or touching it} 


{let the piece sit at least 48 hours before you touch or move it just to be sure the finish and glue are set}


From bachelor-pad boring to lady-office chic! This table now sits in the corner of my den and I absolutely love it. The whole project took two days, a couple of hours and cost less than $75 allowing us to splurge on other more important pieces for our home. Hopefully this post has inspired you to re-imagine something that you already own! 

Photobucket

Wednesday, February 13, 2013

Elle Decor Trends: Beyond Emerald in 2013

With each new year comes new design trend predictions. If you read any interior design blogs you already know that Emerald Green was chosen as the Pantone color of the year. We will be seeing shades of green in everything from finishes to fabrics this coming Market and I have to say I'm delighted such a versatile, natural color was chosen. 

One of my favorite interior design magazines and websites, Elle Decor, went beyond color and predicted the five major design trends for this coming year. Broken down into basic categories I will show you how I'm practically applying the trends of 2013 in my own home.  

1. Brass

From gilded gold to true brass I am fully embracing this trend. One metal does not, however, hold the key to my heart. While brass might remind you of bad early 90's decor at times {yikes} using multiple shades and mixing it with other metals {as seen here} will keep it modern and fresh. 

Our newest addition in this category is a family room cocktail table from Global Views. It's a substantial, heavy piece but the eglomise {gilded glass} top and brass finish keep it feminine and demure. 


2. Green

I know, I know, Pantone has declared Emerald the supreme shade of Green this year but for my own home application I am going to stick with Celadon. Green is actually my favorite color and a shade closer to emerald is one I often choose to wear but when it comes to large upholstered items for my home I tire of things too big or bold. I am opting for a more subdued tone of green for our family room and will layer textures and colors to create personality and life. 

Lesson learned: Never be afraid to modify a trend to make it work for you. Just because something is popular doesn't mean it is the right fit for you and your home. Use trends to guide you but don't be afraid to tweak them so that they reflect you and your individual style. 


{celedon, emerald}
{family room chairs}
{lumbar pillow on the leather chesterfield sofa}


3. Embellished Walls

I have not made it a secret that I love wallpaper. Sadly, our walls are textured here in Texas but that won't stop me from putting pattern on my walls {stay tuned for a future post on that} or from daydreaming. Here are a few of my favorites from Cole & Sons and Farrow & Ball; I tried to include something for everyone: 

{I professed my undying love for this pretty, feminine paper here} 
{this reminds me of my study abroad trip to Florence, perfect for a study} 
 via


{it's technically ocelot, but I am loving this animal print}


{trend combo! I could see this in a fabulous powder room}


{left: preppy and classic goes anywhere. right: love this for a bedroom} 


{a perfect lead in to our next trend...lace} 

4. Lace

I won't claim to love lace. Perhaps my former tomboy self feels it's just too girly or maybe it's because I now share a space with my husband and I don't want our home to feel too feminine. Whatever the reason, I am not naturally drawn to it. There is, however, one exception: our master bedroom bedding. I'm strangely obsessed with the delicate romance of Bella Notte. 


 {our bolster pillow is top left and the throw that I lust after is top right, sigh}
 via


5. Shades of White

Cream, off-white, bone, beige, sand. Unlike lace, this trend might have been created specifically for me. As someone who tires of big, bold patterns and colors I avoid creating a stark, lifeless space by layering these neutrals with various patterns and textures.  


So, tell me. What are your favorite trends for 2013 and how are you incorporating them into your space?  

Photobucket