Showing posts with label before and after. Show all posts

Monday, January 28, 2013

DIY: fireplace surround

In the past few weeks temps have significantly dropped all over the country, including here in Texas. In the spirit of staying warm I thought it was finally appropriate to share this project with you. 

When I found out a wood-burning fireplace came standard with our home I was thrilled. Hailing from the Midwest, both my husband and I have fond memories of chilly evenings and holidays spend around a hearth. The temps might not be sub-zero here in the south but we love the idea of having a fireplace to signify the central gathering place of our home. 

Sounds pretty straight forward, right? There's always a catch.  In our situation it was the surround...or lack there of. Our builder did not include a traditional surround as an option and to have them custom make one was not in our budget. Our solution: build our own. 

I apologize for the lack of photo quality. I only had my iphone at the time these were taken. 


I can distinctly remember being mesmerized by Cinderella's Castle as a little girl. It was a magical place that seemed other-worldly to a five year old. Now, as an adult, I still find myself mesmerized but for different reasons. I'll admit I still think it's a magical place but have you ever stopped to really look at the ornate detail of that building? It's pretty incredible. Not to mention is has withstood decades of abuse love by millions of small children. What makes that possible you ask? The Fypon. 

Fypon Moulded Millwork is constructed of urethane foam. The mixture is kept under pressure in a mould as it expands to any desired shape. The result is a high-density material that is perfect for interior or exterior trim.

If it's good enough for Disney, it's certainly good enough for me. Another major benefit of using this type of material is the fact that it's durable and light. We ordered a door crosshead from this website that arrived promptly on my doorstep in one piece looking like this:  
Underneath the fypon we simply measured and cut pieces of primed moulding and trim from our local Home Depot. 
                                  

The most important thing you can do at this stage is make sure your measurements are accurate. Since we were dealing with a 3 dimensional object that will need to hold weight it was very important that all of the seams matched up tightly. 


Once all of the pieces were attached to the wall we filled any nail holes, sanded rough edges and primed the entire piece. 


We completed the project with two layers of white paint and some caulking to fill in the seams.
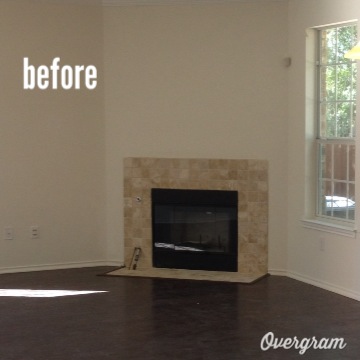



Next I will pick a few pieces from my "lust list" to add personality and color to the space. Stay tuned!


Wednesday, August 22, 2012

before + after: staircase


finial: an architectural device, typically carved in stone and employed decoratively to emphasize the apex of a gable or any of various distinctive ornaments at the top, end, or corner of a building or structure.

I finally have a finial. When I told my husband we were going to attach a pineapple finial to our bannister he simply nodded and said, "Great idea, honey." It wasn't until our wooden fruit arrived via ups and I saw the blank stare on his face that I knew why I had not received any pushback or questions about this design decision: he had no idea what a finial was. Truth be told, even I needed to be reminded of its proper name when I first began brainstorming.


To me the pineapple shape is extremely classic, often displayed in stone or metal at the end of grand stairways in sophisticated homes. Since our abode is a bit more humble we opted for carved wood, merely to capture the essence of sophistication and character...and to prevent our bannister from being completely bland.

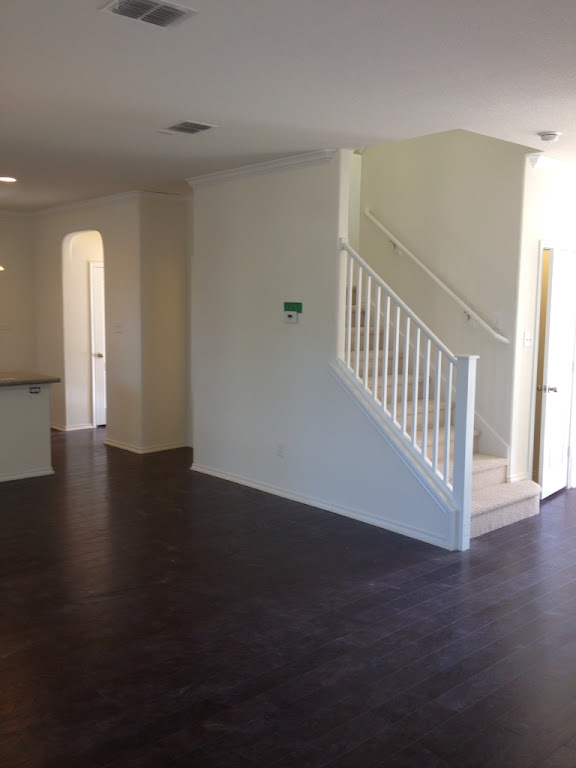
staircase: before


staircase: after


We didn't have room in the budget for iron railings or decorative banisters so this inexpensive piece found online here was the perfect $20 addition. We added a clear glaze so that hand grease wouldn't cause discoloration over time and opted to keep it a natural wood tone so that it stood out from the trim and molding (it also happens to be the same tone as our rustic dining table which makes me internally happier than it should).

When updating a home it's essential to focus the big dollars on high impact projects (ie: the kitchen) and then find small, inexpensive ways to add character and personality in other, less significant areas.

finial fun fact: even the Grand staircase on the Titanic had pineapple finials!


Wednesday, August 15, 2012

before + after: dining room


Until last week, I had never owned a dining table. I spent the better part of 6 years eating dinner on barstools at an island or at a cocktail table in front of the TV. Needless to say, I'm pumped that I can finally eat like an adult. So pumped in fact that my husband has asked me on numerous occassions who we are having over for dinner because I set the table for four "just for fun." Sorry I'm not sorry.

We weren't exactly sure what kind of table we wanted (as indicated by the multiple posts I've dedicated to the topic) but once the 1900's Boulangerie French Bakery Table from Restoration Hardware came into our lives, there was no turning back. I love the rustic feel that it adds to our more modern kitchen. Rustic-Modern, is that even a term? I think they call it eclectic these days but no matter how you put it, we like to mix different looks. It makes our home feel more like it was pieced together with elements that we love rather than purchased out of a catalog.

Without further adieu here is the before + after of our dining room.


{when we first moved in}


{now}

What do you think about the rustic table with the modern aluminum chairs? 


I tend to gravitate toward the clean and timeless decor for everyday, but the dinner table is the perfect place to add color to your home and play with trends. As noted above I've been pretty excited about setting the table lately so here are a few "fun" looks I've been trying out. 

Feminine + Floral


Ikat + Tortoise with a pop of my favorite color: red-orange. 


My table top resources are currently limited, but now that I have such a fab table to dress I will most certainly dedicate future posts to new themes. This opens a whole new shopping door for me (my husbands eyes are rolling as we speak). Does anyone have a favorite go-to kitchen store? Also, the one major element missing in this room is a chandelier. Any advice or suggestions?

Monday, August 13, 2012

before + after: kitchen


It's a miracle. The boxes are gone and we have finally begun to settle in. The moment we had keys-in-hand we began our first project: the kitchen. We loved the layout but wanted to give the space more personality and sophistication while staying within our budget. It was financially impossible for us to upgrade to the "gourmet kitchen" at the design center (they didn't offer the the materials or appliances we wanted anyway) so we went out on our own and hired individual craftsmen to do the work. Let me start by saying this path is not for the faint of heart. My sympathy and respect for contractors has grown exponentially these last few weeks. 
Even though we endured a few extra headaches and I had to dig deep to find patience I never knew I had, we couldn't be happier with the way our kitchen turned out. To fully appreciate the transformation, we must start at the very beginning...

{phase one: the frame}    


{phase two: sheetrock + cabinetry}


{phase three: floors, counters + appliances} 


{phase four: renovation}

+ carrara marble and absolute black granite countertops
+ basin sink and industrial faucet
+ double oven, gas range 
+ chrome hardware
+ subway tile backsplash
+ pendant lights 

goal: an open, bright, transitional kitchen 


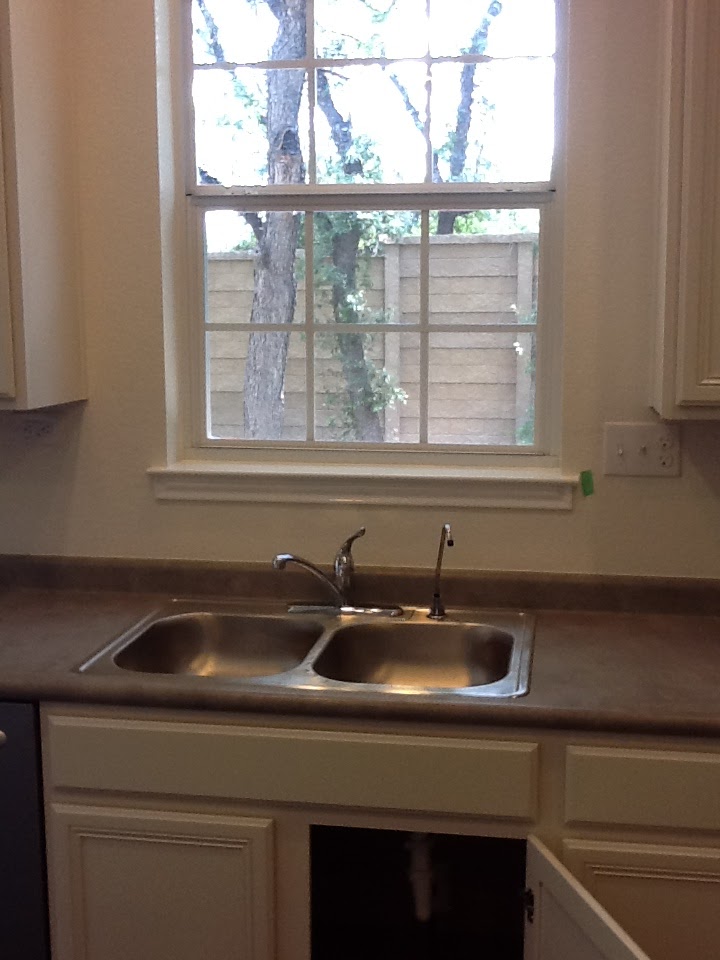
{sink: before}


{sink: after}

{backsplash: before}

{backsplash: after}

{range: before}

{range: after}


There are still a few projects left and more personal touches to add, but we are so glad we didn't settle for a cookie cutter kitchen. It's a reflection of us and it truly feels like home.