In the past few weeks temps have significantly dropped all over the country, including here in Texas. In the spirit of staying warm I thought it was finally appropriate to share this project with you.
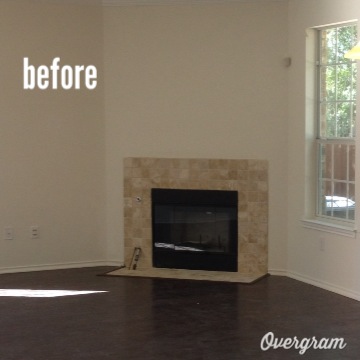
When I found out a wood-burning fireplace came standard with our home I was thrilled. Hailing from the Midwest, both my husband and I have fond memories of chilly evenings and holidays spend around a hearth. The temps might not be sub-zero here in the south but we love the idea of having a fireplace to signify the central gathering place of our home.
Sounds pretty straight forward, right? There's always a catch. In our situation it was the surround...or lack there of. Our builder did not include a traditional surround as an option and to have them custom make one was not in our budget. Our solution: build our own.
I apologize for the lack of photo quality. I only had my iphone at the time these were taken.


I can distinctly remember being mesmerized by Cinderella's Castle as a little girl. It was a magical place that seemed other-worldly to a five year old. Now, as an adult, I still find myself mesmerized but for different reasons. I'll admit I still think it's a magical place but have you ever stopped to really look at the ornate detail of that building? It's pretty incredible. Not to mention is has withstood decades of abuse love by millions of small children. What makes that possible you ask? The Fypon.
Fypon Moulded Millwork is constructed of urethane foam. The mixture is kept under pressure in a mould as it expands to any desired shape. The result is a high-density material that is perfect for interior or exterior trim.
If it's good enough for Disney, it's certainly good enough for me. Another major benefit of using this type of material is the fact that it's durable and light. We ordered a door crosshead from this website that arrived promptly on my doorstep in one piece looking like this:

Underneath the fypon we simply measured and cut pieces of primed moulding and trim from our local Home Depot.

The most important thing you can do at this stage is make sure your measurements are accurate. Since we were dealing with a 3 dimensional object that will need to hold weight it was very important that all of the seams matched up tightly.

Once all of the pieces were attached to the wall we filled any nail holes, sanded rough edges and primed the entire piece.

We completed the project with two layers of white paint and some caulking to fill in the seams.


No comments:
Post a Comment